A Meeting Group represents a set of interrelated meetings (E.g. Site Meetings).
Each meeting contains a set of meeting minutes that are recorded over the duration of a meeting by a project team member.
To create a Meeting Group, follow the steps below.
Step 1: Go to Meeting Minutes
Navigate to your management module and click on the Meeting Minutes tool to access your project’s Meeting Groups.
Step 2: Create a Meeting Group
Click the “CREATE FOLDER” button to create a Meeting Group.
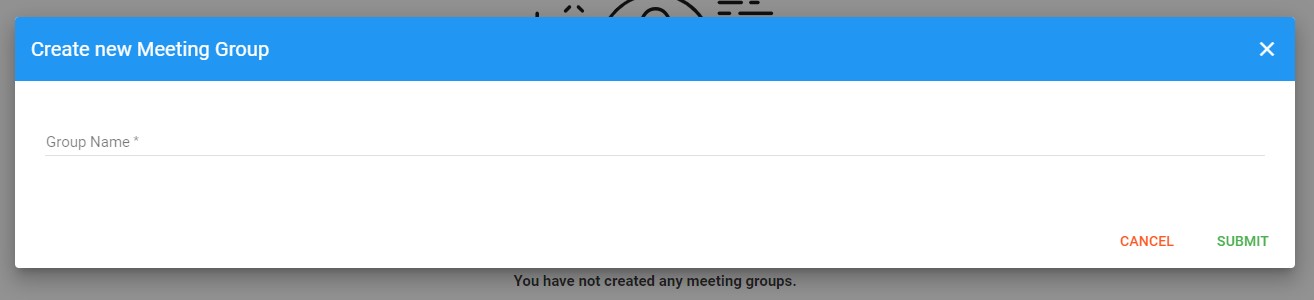
Step 3: Enter the Meeting Group name and save
Enter the name of your Meeting Group and click the “SUBMIT” button.
Meeting Minutes - Create a new meeting and record meeting minutes
Meeting Minutes – Create a new meeting and record meeting minutes
To set up a new meeting and start recording meeting minutes, follow the steps below.
Step 1: Go to Meeting Minutes
Navigate to your management module and click on the Meeting Minutes tool to access your project’s Meeting Groups.
Step 2: Select a Meeting Group
Select the Meeting Group folder that relates to your meeting.
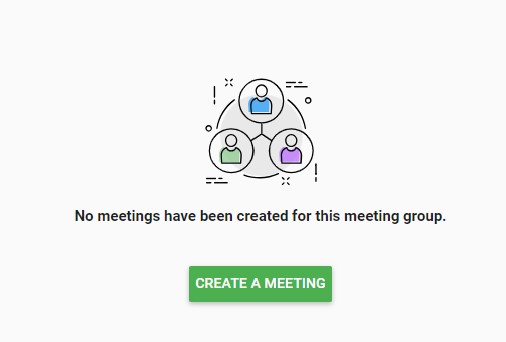
Step 3: Create a Meeting
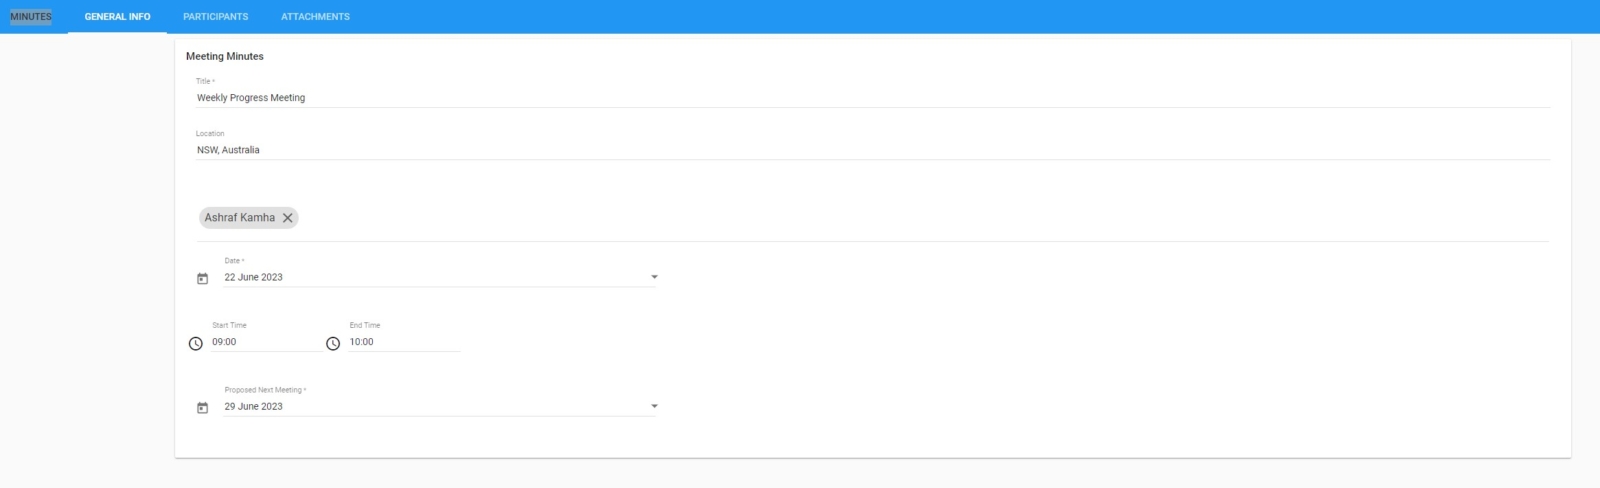
Click the “CREATE A MEETING” button to set up your meeting.
Add your meeting title, date, start/end time and proposed next meeting date. You can then add your meeting participants (i.e. those in attendance) by clicking the “ADD MORE” button on the top right-hand side of the “Participants” block.
Click the “SAVE” button on the top right-hand side of your screen to start recording your minutes.
Note: All “Meeting Participants” will receive an email notification allowing them to download a copy of the Meeting Minutes pdf file, so be sure to include everyone in the meeting that requires a copy.
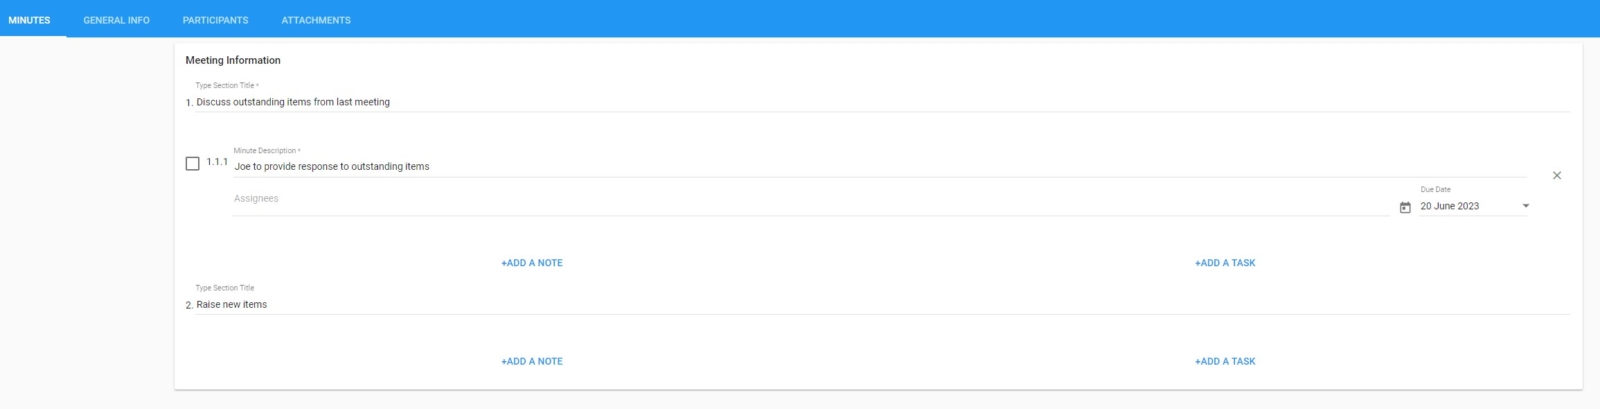
Step 4: Add Sections
Type a section title to label your topic of discussion.
Step 5: Add minutes
Add a task or a note to your section by clicking the related buttons.
Tasks include a minute description, assignee and due date. Notes are used to log items that are not actionable under your section.
Step 6: Add attachments (optional)
Click the small floating paperclip button to reveal the attachment options for your meeting.
Attach a plan/file from your document register to your meeting
Markup a plan from your document register and attach it to your meeting
Attach any form notice from your Management module to your meeting
Attach a photo or file from your device to your meeting
Step 7: Send, Save or Save as draft
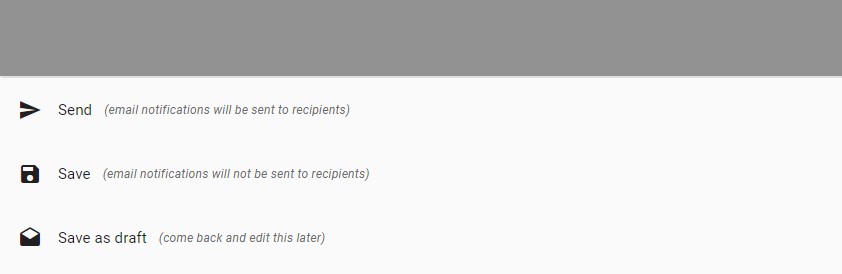
After adding all related information to your meeting, click the “DONE” button on the top right-hand side of your screen to reveal the below options:
Send (email notifications are sent to recipients)
Save (email notifications are not sent to recipients, but a meeting is logged)
Save as draft (come back to your meeting later)
Step 8: Notifications (if sent)
After sending out your Meeting Minutes, each contact receives an email notification like the one in the example below.
Recipients can click the “Download Meeting Minutes” button to download the Meeting Minutes pdf and any related attachments.
A record of the meeting is added to your Meeting Group folder, including all related information.
Note: Meeting Minutes email notifications are one-way only, so replies to these emails from recipients are not relayed to the sender.
Example: Meeting Minutes pdf file
Step 9: Review Meeting Minutes (next meeting)
New Meeting Minutes are carried forward from one meeting to the next to be reviewed, before recording additional minutes under each section.
To review a set of meeting minutes, start by creating a new meeting in the related Meeting Group folder. All minutes from the previous meeting will be displayed.
You can then mark each minute (i.e. a task or a note) as completed/reviewed, by clicking the checkbox on the left-hand side of each.
Minutes that are not checked will be carried forward to the next meeting and will continue to appear in corresponding meetings until they are completed/reviewed.
Note: once minutes are checked off, they do not appear in the next meeting.
Meeting Minutes - Review the minutes of a previous meeting
Meeting Minutes – Review the minutes of a previous meeting
New Meeting Minutes are carried forward from one meeting to the next to be reviewed, before recording additional minutes under each section.
To review a set of meeting minutes, follow the steps below.
Step 1: Create a new meeting
Start by creating a new meeting in the related Meeting Group folder. All minutes from the previous meeting will be displayed.
Step 2: Review minutes
Mark each minute (i.e. a task or a note) as completed/reviewed, by clicking the checkbox on the left-hand side of each.
Minutes that are not checked will be carried forward to the next meeting and will continue to appear in corresponding meetings until they are completed/reviewed.
Minutes that are been marked off appear in the Meeting Minutes pdf file in grey (see the example at the bottom of this page).
Note: Once minutes are checked off, they do not appear in the next meeting.
Step 3: Add new sections and log meeting minutes
Add additional minutes under each section related to your new meeting. You can also create additional sections for any new topics of discussion.
Step 4: Add attachments (optional)
Click the small floating paperclip button to reveal the attachment options for your meeting.
Attach a plan/file from your document register to your meeting
Markup a plan from your document register and attach it to your meeting
Attach any form notice from your Management module to your meeting
Attach a photo or file from your device to your meeting
Step 5: Send, Save or Save as draft
After adding all related information to your meeting, click the “DONE” button on the top right-hand side of your screen to reveal the below options:
Send (email notifications are sent to recipients)
Save (email notifications are not sent to recipients, but a meeting is logged)
Save as draft (come back to your meeting later)
Step 6: Notifications (if sent)
After sending out your Meeting Minutes, each contact receives an email notification. Recipients can click the “Download Meeting Minutes” button to download the Meeting Minutes pdf and any related attachments.
A record of the meeting is added to your Meeting Group folder, including all related information.
Note: Meeting Minutes email notifications are one-way only, so replies to these emails from recipients are not relayed to the sender.
Example: Meeting Minutes pdf file (including marked off minutes in grey)
Meeting Minutes - Export a Meeting Group
Meeting Minutes – Export a Meeting Group
To export all meetings within a Meeting Group, follow the steps below.
Step 1: Go to Meeting Minutes
Navigate to your management module and click on the Meeting Minutes tool to access your project’s Meeting Groups.
Step 2: Click the overflow button
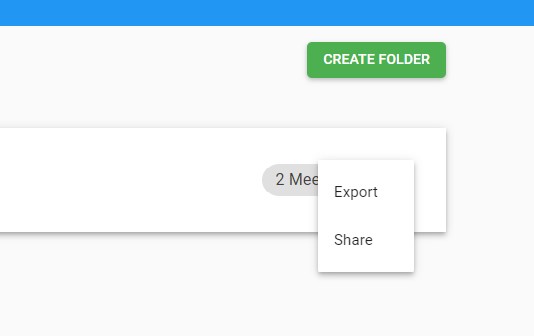
Click the overflow button on the right-hand side of a Meeting Group block and select “Export” from the menu.
Note: To select multiple Meeting Groups, hover over the block and click the check box on the left-hand side of the Meeting Group title.
Meeting Minutes - Export selected Meetings
Meeting Minutes – Export selected Meetings
To export selected meetings within a Meeting Group, follow the steps below.
Step 1: Go to Meeting Minutes
Navigate to your management module and click on the Meeting Minutes tool to access your project’s Meeting Groups.
Step 2: Select a Meeting Group
Select the Meeting Group folder that relates to your meeting you wish to export.
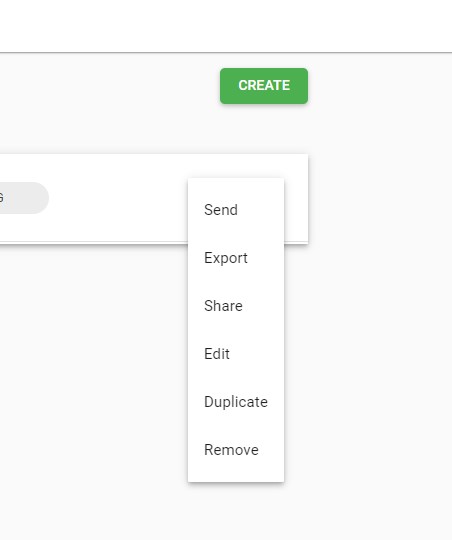
Step 3: Click the overflow button
Click the overflow button on the right-hand side of a Meeting block and select “Export” from the menu.
Note: To select multiple Meetings, hover over the block and click the checkbox on the left-hand side of the Meeting Group title.
Meeting Minutes - Share a Meeting Group
Meeting Minutes – Share a Meeting Group
To share all meetings within a Meeting Group, follow the steps below.
Step 1: Go to Meeting Minutes
Navigate to your management module and click on the Meeting Minutes tool to access your project’s Meeting Groups.
Click the overflow button
Click the overflow button on the right-hand side of a Meeting Group block and select “Share” from the menu.
Note: To select multiple Meeting Groups, hover over the block and click the checkbox on the left-hand side of the Meeting Group title.
Step 3: Add recipients and share
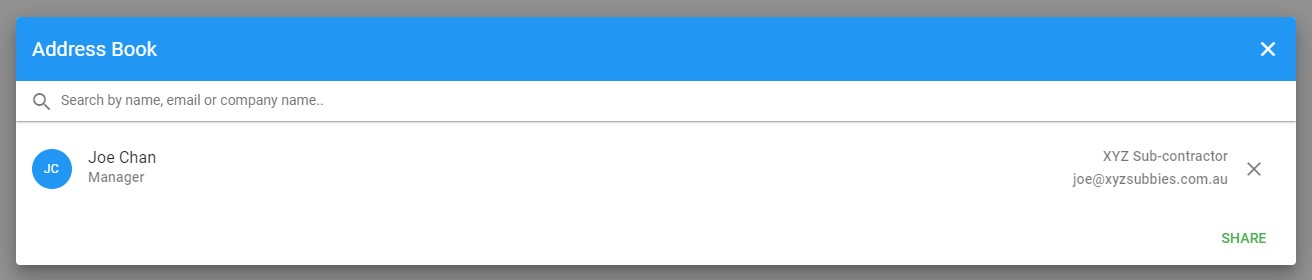
Add one or more contacts you would like to share your selected Meeting Groups with by typing into the search field and selecting them from the list.
If the contact you are searching for isn’t in your address book, click the “ADD NEW CONTACT” button to add them.
Note: You can search for anyone in your address book by contact name, email address, company name or tag. Contacts do not require a Webuild account to view or download shared notices.
Step 4: Notifications
After sharing a Meeting Group, each contact receives an email notification for each Meeting in the related Meeting Group.
Recipients can click the “Download Meeting” button to download the Meeting Minutes pdf and any related attachments.
Meeting Minutes - Share selected Meetings
Meeting Minutes – Share selected Meetings
To share selected meetings within a Meeting Group, follow the steps below.
Step 1: Go to Meeting Minutes
Navigate to your management module and click on the Meeting Minutes tool to access your project’s Meeting Groups.
Step 2: Select a Meeting Group
Select the Meeting Group folder that relates to your meeting you wish to share.
Step 3: Click the overflow button
Click the overflow button on the right-hand side of a Meeting block and select “Share” from the menu.
Note: To select multiple Meetings, hover over the block and click the check box on the left-hand side of the Meeting title.
Step 4: Add recipients and share
Add one or more contacts you would like to share your selected Meeting Groups with by typing into the search field and selecting them from the list.
If the contact you are searching for isn’t in your address book, click the “ADD NEW CONTACT” button to add them.
Note: You can search for anyone in your address book by contact name, email address, company name or tag. Contacts do not require a Webuild account to view or download shared notices.
Step 5: Notifications
After sharing selected Meetings, each contact receives one email notification per Meeting.
Recipients can click the “Download Meeting” button to download the Meeting Minutes pdf and any related attachments.
Example: Meeting Minutes pdf file
Meeting Minutes - Remove selected Meetings
Meeting Minutes – Remove selected Meetings
To remove selected meetings within a Meeting Group, follow the steps below.
Step 1: Go to Meeting Minutes
Navigate to your management module and click on the Meeting Minutes tool to access your project’s Meeting Groups.
Step 2: Select a Meeting Group
Select the Meeting Group folder that relates to your meeting you wish to remove.
Step 3: Click the overflow button
Click the overflow button on the right-hand side of a Meeting block and select “Remove” from the menu.
Note: To select multiple Meetings, hover over the block and click the checkbox on the left-hand side of the Meeting Group title.
Critical Path Method (CPM) is a defining resource for the construction industry. First developed in the late 1950s, the critical path method has been utilised in a variety of project development projects including engineering, aerospace and plant maintenance. CPM has rapidly become an essential staple for construction projects today, but many business owners are intimidated from what is perceived as a complex process.
https://www.webuildcs.com/wp-content/uploads/Scheduling_blog_thumbnail-copy.jpg7491123WeBuildhttps://www.webuildcs.com/wp-content/uploads/webuild-logo-R.pngWeBuild2023-04-05 11:18:322023-08-25 03:53:29Critical Path Method: Simplifying the process for your construction business
The value of As Built drawings is often underrated, especially their importance for the efficient management of the project after construction has been completed. This article takes a brief look at As Built drawings; what they are, how they are created and why they are important.
https://www.webuildcs.com/wp-content/uploads/A-guide-to-As-Built-Drawings.png315560WeBuildhttps://www.webuildcs.com/wp-content/uploads/webuild-logo-R.pngWeBuild2023-04-04 12:37:002023-07-23 10:09:39A Guide To Construction As Built Drawings
The customary monthly clients meeting is a time when you have the chance to give your clients progress updates about their project and provide them with a monthly report. Your monthly report says a lot about your professionalism and should not be rushed or overlooked. It is an ideal way to instill confidence in your clients about your company’s ability to communicate, and to demonstrate that you have a solid understanding of their project and their priorities.
https://www.webuildcs.com/wp-content/uploads/How-to-prepare-the-best-construction-client-report.png315560WeBuildhttps://www.webuildcs.com/wp-content/uploads/webuild-logo-R.pngWeBuild2023-04-03 11:35:132023-07-23 10:07:42How to prepare a great construction client report (Infographic)