To add your schedule’s working days, follow the steps below.
Note: Working days impact certain schedule calculations, such as “task duration”, “finish variance” and the “Days Ahead/Days Behind” dashboard widget metric.
Step 1: Go to your Project’s Schedule
Navigate to your Management module of your project and click on the Scheduling tool to access your project’s Schedule table.
Step 2: Click the overflow button
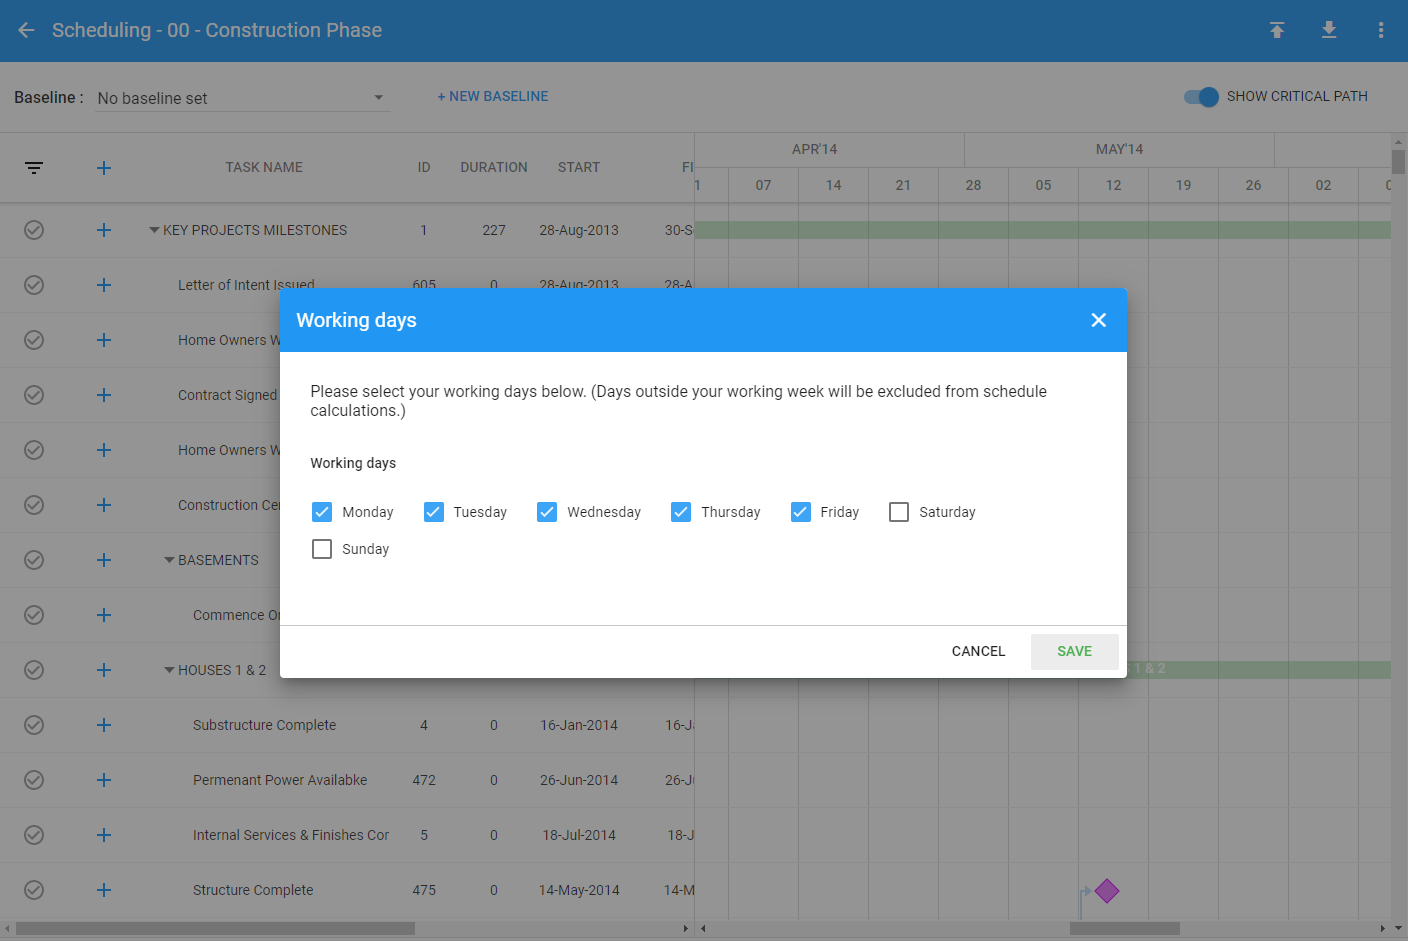
Click on the overflow button on the top-right hand side of your schedule and select “Working days” from the menu.
Step 3: Add your schedule’s working week
Select the working days related to your project and click the “SAVE” button.
Scheduling - Create a Project item in your schedule
Scheduling – Create a Project item in your schedule
A “Project” item in your schedule represents the “parent” for a group of “child” items (i.e. projects, tasks or milestones).
A Project’s start date, end date and progress percentage is calculated automatically based on dependencies from all “child” items.
To create a Project in your schedule, follow the steps below.
Step 1: Go to your project’s Schedule
Navigate to your Management module in the related project and click on the Scheduling tool to access your project’s Schedule.
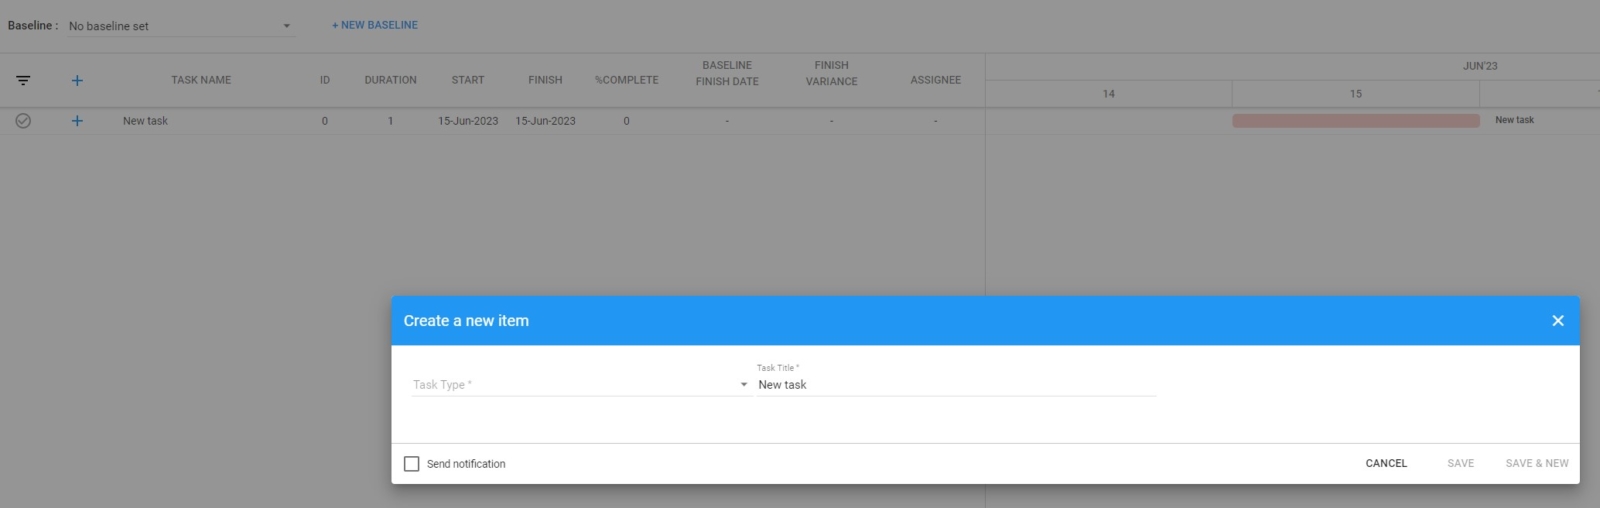
Step 2: Create a new item
To create a new Project, click the blue “+” button, located just beneath the baseline menu.
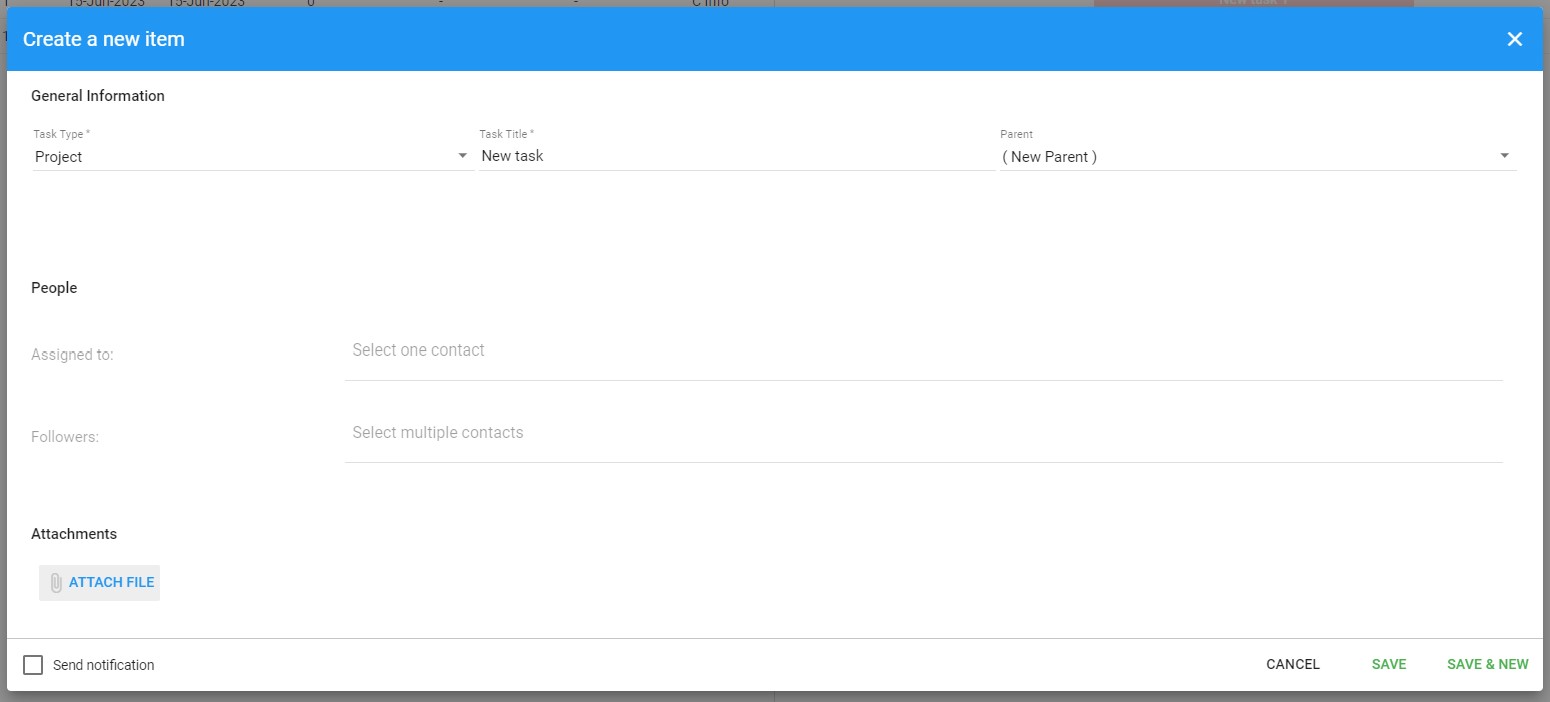
Step 3: Select the item type
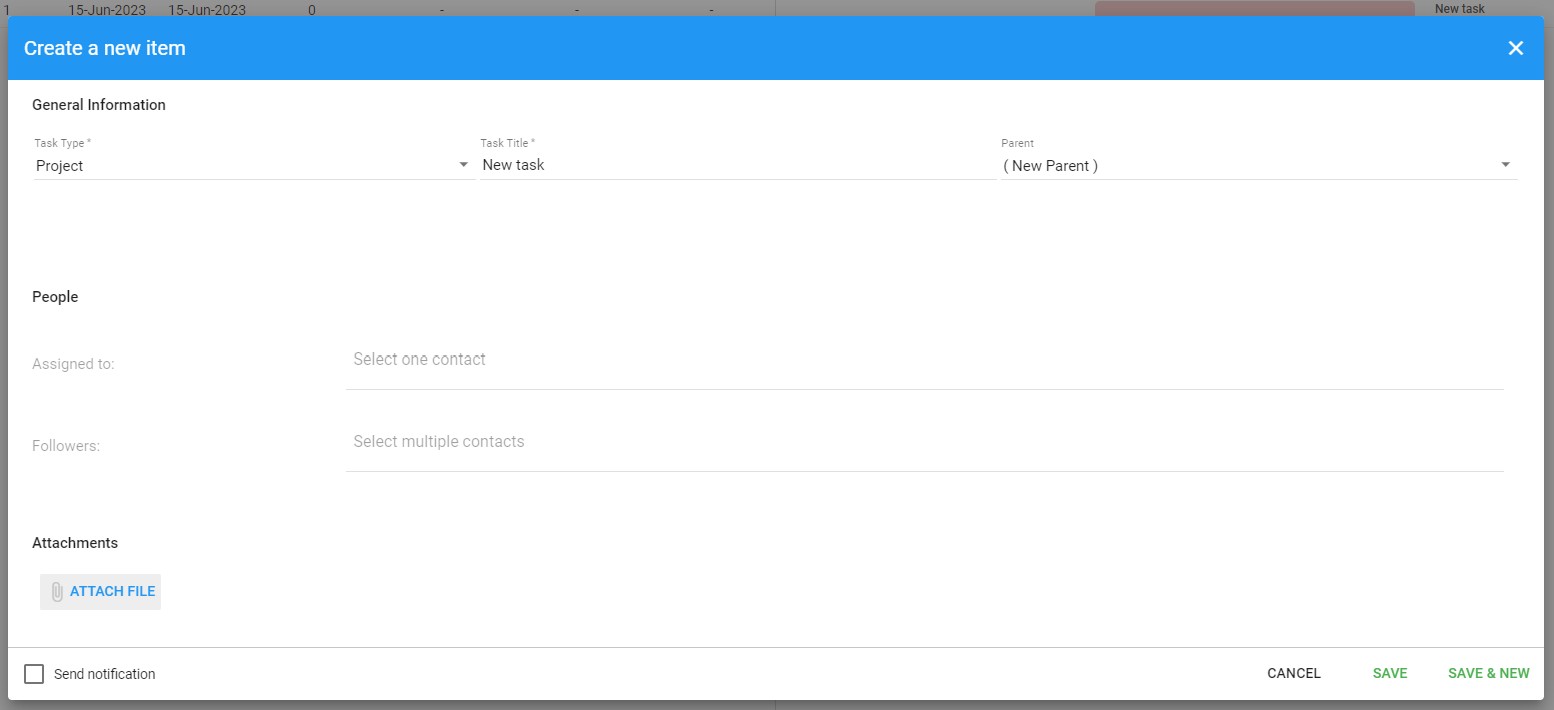
Click the “Task Type” menu and select “Project”.
If your project is the child of another item, select the related parent item from the “Parent” menu, otherwise leave this field as “(New Parent)”.
Step 4: Add the item’s title, assignee & followers
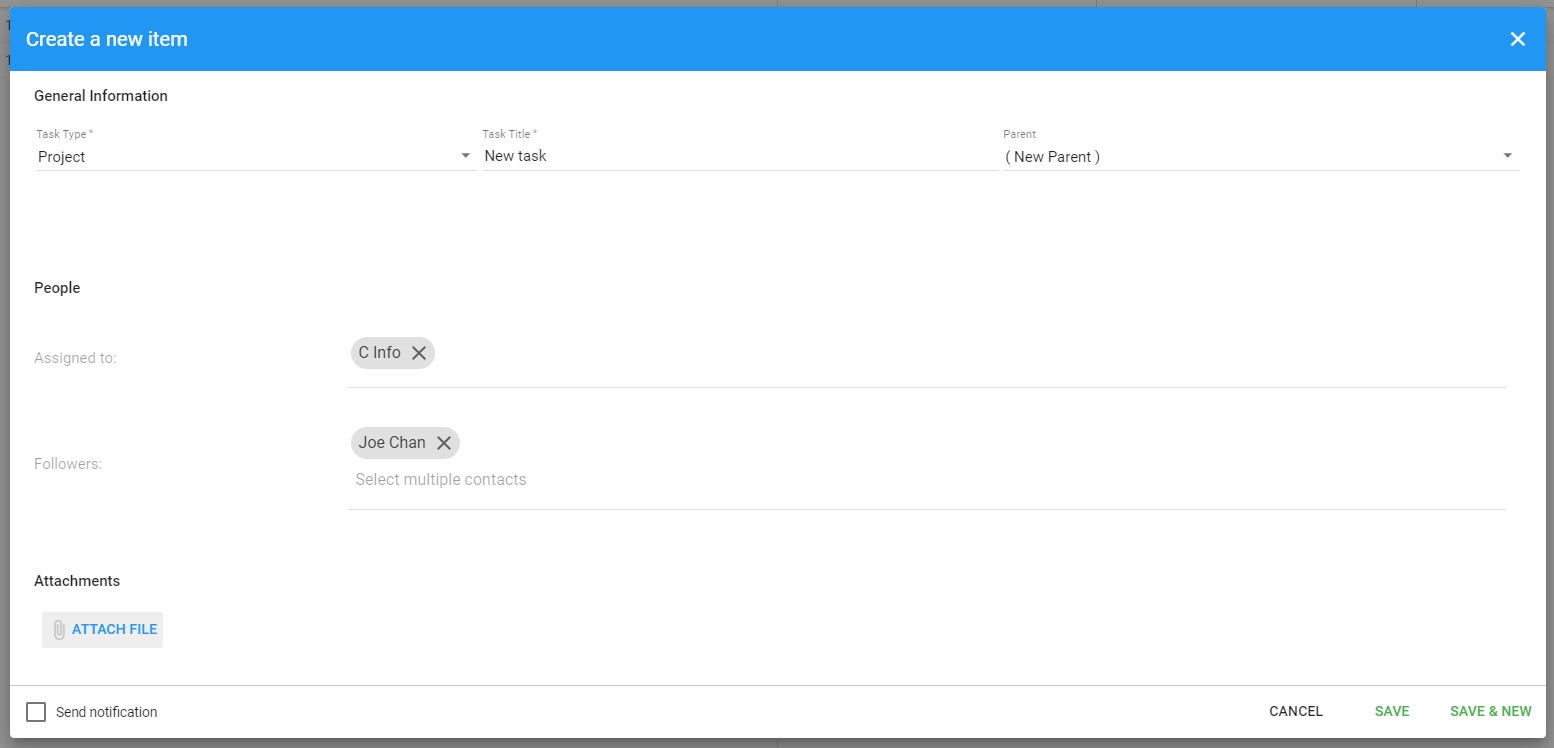
Type the name of the item in the “Title” field, then search for the related assignee and followers (if any).
You can assign Schedule items to anyone in your address book and include any other interested parties as “followers” to keep them in the loop with any comments or related email notifications.
If the contact you are searching for isn’t in your address book, click the “ADD NEW CONTACT” button to add them.
Note: You can search for anyone in your address book by contact name, email address, company name or tag. Contacts do not require a WeBuild account to view or respond to your Schedule item.
Step 5: Add attachments (optional)
Add an attachment from your device by clicking the “ATTACH FILE” button.
Step 6: Click “SAVE”
Click the “SAVE” button to save your item and send notifications to the related contacts.
If you’d prefer not to send email notifications, uncheck the “Send notifications” box, located on the bottom-left hand side of the item dialog.
Step 7: Notifications (if sent)
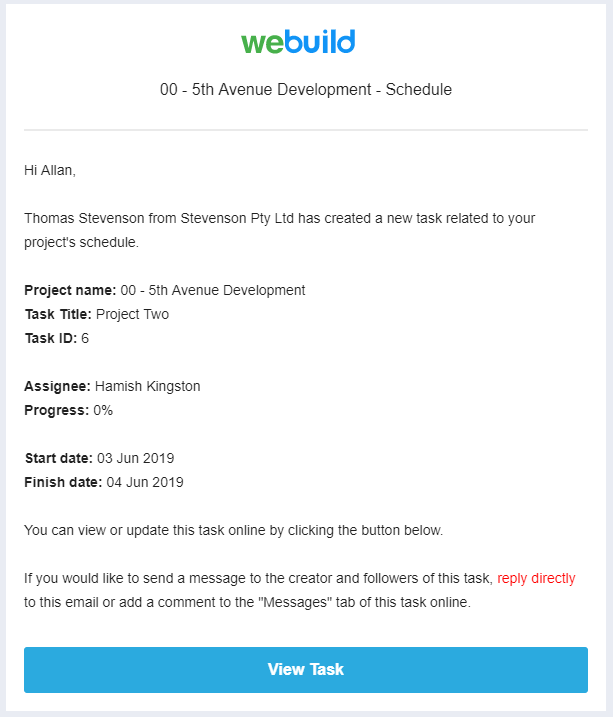
After creating a Project in your schedule, each assignee and follower receives an email notification.
Any related attachments will also be included with the email notification.
Recipients can also click the “View Task” button to view the schedule item and related files via the interface.
Note: If you assign a task to yourself, you will not receive an email notification.
Example: Schedule email notification – assigning a Project
Step 8: Responses or questions
All recipients can send a response to the schedule item or ask any questions by replying directly to the email notification. The item creator and all other related contacts will receive the related updates via email.
Schedule item creators, assignees and followers can also send messages via the item’s “MESSAGES” tab when viewing the item online.
All replies to schedule item emails and messages will also be logged in the item’s “MESSAGES” tab, which can be accessed by clicking on the related item from the interface.
Note: Recipients that are not a part of your organisation will only be able to view and access the schedule items that relate to them.
Scheduling - Create a Task item in your schedule
Scheduling – Create a Task item in your schedule
A “Task” item in your schedule represents an item that is to be completed within a set period of time.
Tasks can be independent or have a relation to other schedule items (i.e. the parent of a number of items and/or the child of one particular item).
“Parent” tasks have no dependencies from any related child items (i.e. the Task’s start date, end date and progress percentage is not calculated automatically based on dependencies from all “child” items).
To create a Task in your schedule, follow the steps below.
Step 1: Go to your Project’s Schedule
Navigate to your Management module in your related project and click on the Scheduling tool to access your project’s Schedule.
Step 2: Create a new item
To create a new Task, click the blue “+” button, located just beneath the baseline menu.
Step 3: Select the item type
Click the “Task Type” menu and select “Task”.
If your Task is the child of another item, select the related parent item from the “Parent” menu, otherwise leave this field as “(New Parent)”.
Step 4: Add the item’s title, assignee & followers
Type the name of the item in the “Title” field, then search for the related assignee and followers (if any).
You can assign Schedule items to anyone in your address book and include any other interested parties as “followers” to keep them in the loop with any comments or related email notifications.
If the contact you are searching for isn’t in your address book, click the “ADD NEW CONTACT” button to add them.
Note: You can search for anyone in your address book by contact name, email address, company name or tag. Contacts do not require a WeBuild account to view or respond to your Schedule item.
Step 5: Add attachments (optional)
Add an attachment from your device by clicking the “ATTACH FILE” button.
Step 6: Click “SAVE”
Click the “SAVE” button to save your item and send notifications to the related contacts.
If you’d prefer not to send email notifications, uncheck the “Send notifications” box, located on the bottom-left hand side of the item dialog.
Step 7: Notifications (if sent)
After creating a Task in your schedule, each assignee and follower receives an email notification.
Any related attachments will also be included with the email notification.
Recipients can also click the “View Task” button to view the schedule item and related files via the interface.
Note: If you assign a task to yourself, you will not receive an email notification.
Step 8: Responses or questions
All recipients can send a response to the schedule item or ask any questions by replying directly to the email notification. The item creator and all other related contacts will receive the related updates via email.
Schedule item creators, assignees and followers can also send messages via the item’s “MESSAGES” tab when viewing the item online.
All replies to schedule item emails and messages will also be logged in the item’s “MESSAGES” tab, which can be accessed by clicking on the related item from the interface.
Note: Recipients that are not a part of your organisation will only be able to view and access the schedule items that relate to them.
Scheduling - Create a Milestone item in your schedule
Scheduling – Create a Milestone item in your schedule
Milestones are generally used to indicate important dates in your project’s schedule, often key events or goals. For example, you might use milestones to mark desired completion dates, or project review meetings.
To create a Milestone in your schedule, follow the steps below.
Step 1: Go to your Project’s Schedule
Navigate to your Management module in your related project and click on the Scheduling tool to access your project’s Schedule.
Step 2: Create a new item
To create a new Milestone, click the blue “+” button, located just beneath the baseline menu.
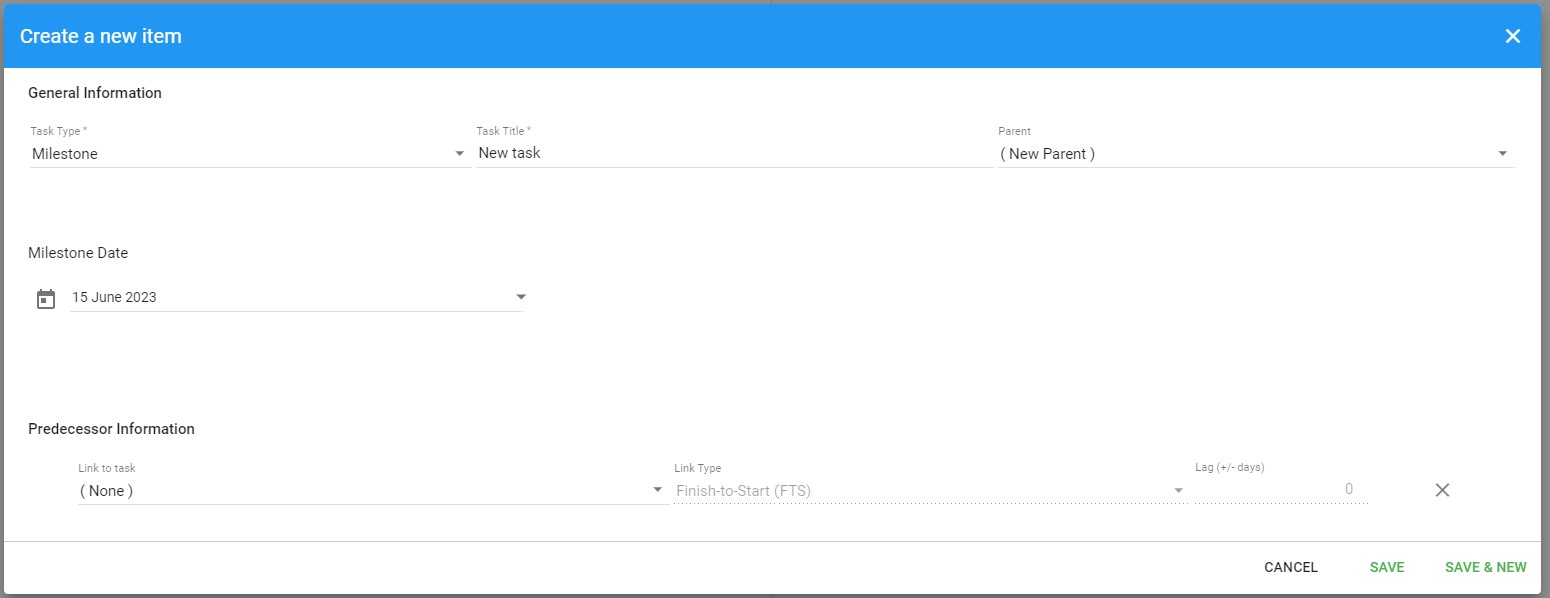
Step 3: Select the item type
Click the “Task Type” menu and select “Milestone”.
If your Milestone is the child of another item, select the related parent item from the “Parent” menu, otherwise leave this field as “(New Parent)”.
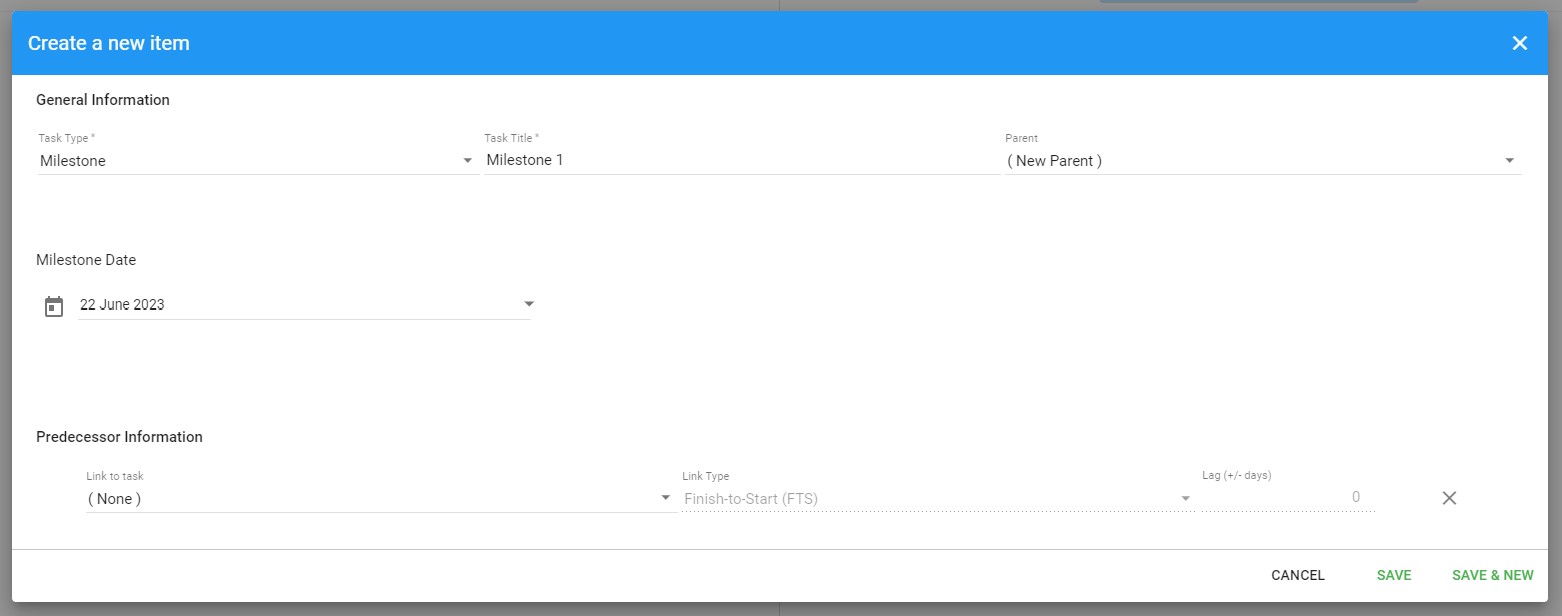
Step 4: Add the Milestone’s title and date
Type the name of the item in the “Title” field, select the related milestone date and click the “SAVE” button to add your milestone to the schedule.
Note: No email notifications are sent for Milestone items.
Scheduling - Import a schedule from MS Project
Scheduling – Import a schedule from MS Project
To import a schedule from Microsoft (MS) Project, follow the steps below.
Note: All items you create in your schedule will be replaced after importing from Microsoft (MS) Project.
Step 1: Export your Schedule from MS Project
Before importing your file in to your project’s Schedule tool, please first open MS Project and save your file in “.mpp” format to your device.
If you would like some steps to guide you through this step, see this article.
Step 2: Go to your Project’s Schedule
Navigate to your Management module in your related project and click on the Scheduling tool to access your project’s Schedule.
Step 3: Click the Import icon button
Click the Import from MS Project icon upward facing button in the top right hand corner to open your device’s file explorer.
Step 4: Select your MS Project file
Select your MS Project (.mpp) file and select open to import your Schedule.
Scheduling - Bulk assign items to contacts in your schedule
Scheduling – Bulk assign items to contacts in your schedule
The Bulk Assign tool allows you to add or replace assignees and followers for selected Projects and Tasks in your schedule.
To add an assignee and followers to two or more items at once, follow the steps below.
Step 1: Go to your project’s Schedule
Navigate to your Management module in your related project and click on the Scheduling tool to access your project’s Schedule.
Step 2: Select items
Click on an item in your schedule, then hold the SHIFT or CTRL key and click to select multiple items.
Note: Bulk Assign applies to Projects and Tasks only (milestones are excluded.)
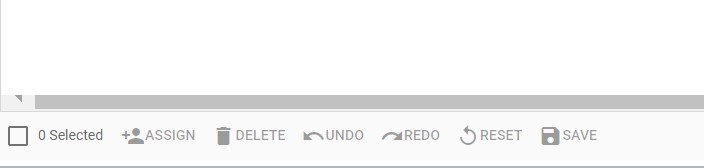
Step 3: Click the “ASSIGN” button
Click the “ASSIGN” button located on the bottom toolbar.
Step 4: Review selected items
Review your selected items before adding your assignees and followers.
Note: All current assignees and followers will be replaced by your selection.
Step 5: Add assignee and followers
Assignees and followers of tasks can view, edit and add comments to schedule items. They are also kept in the loop with any comments or changes to schedule items.
Select one assignee and any number of followers by typing in to the related search fields and selecting each from the list.
Step 6: Notifications
After bulk assigning items in your schedule, each assignee and follower receives an email notification.
Recipients can also click the “View Task” button to view the schedule items and related files via the interface.
Scheduling - View an item in your schedule
Scheduling – View an item in your schedule
To view the details of an item in your schedule, follow the steps below.
Step 1: Go to your project’s Schedule
Navigate to your Management module in your related project and click on the Scheduling tool to access your project’s Schedule.
Step 2: Double click on an item
Double click on an item in your schedule to view the related details, comments and attachments.
Scheduling - Export your schedule to MS Project
Scheduling – Export your schedule to MS Project
To export a copy of your project’s schedule in MS Project format (.xml), follow the steps below.
Step 1: Go to your Project’s Schedule
Navigate to your Management module in your related project and click on the Scheduling tool to access your project’s Schedule.
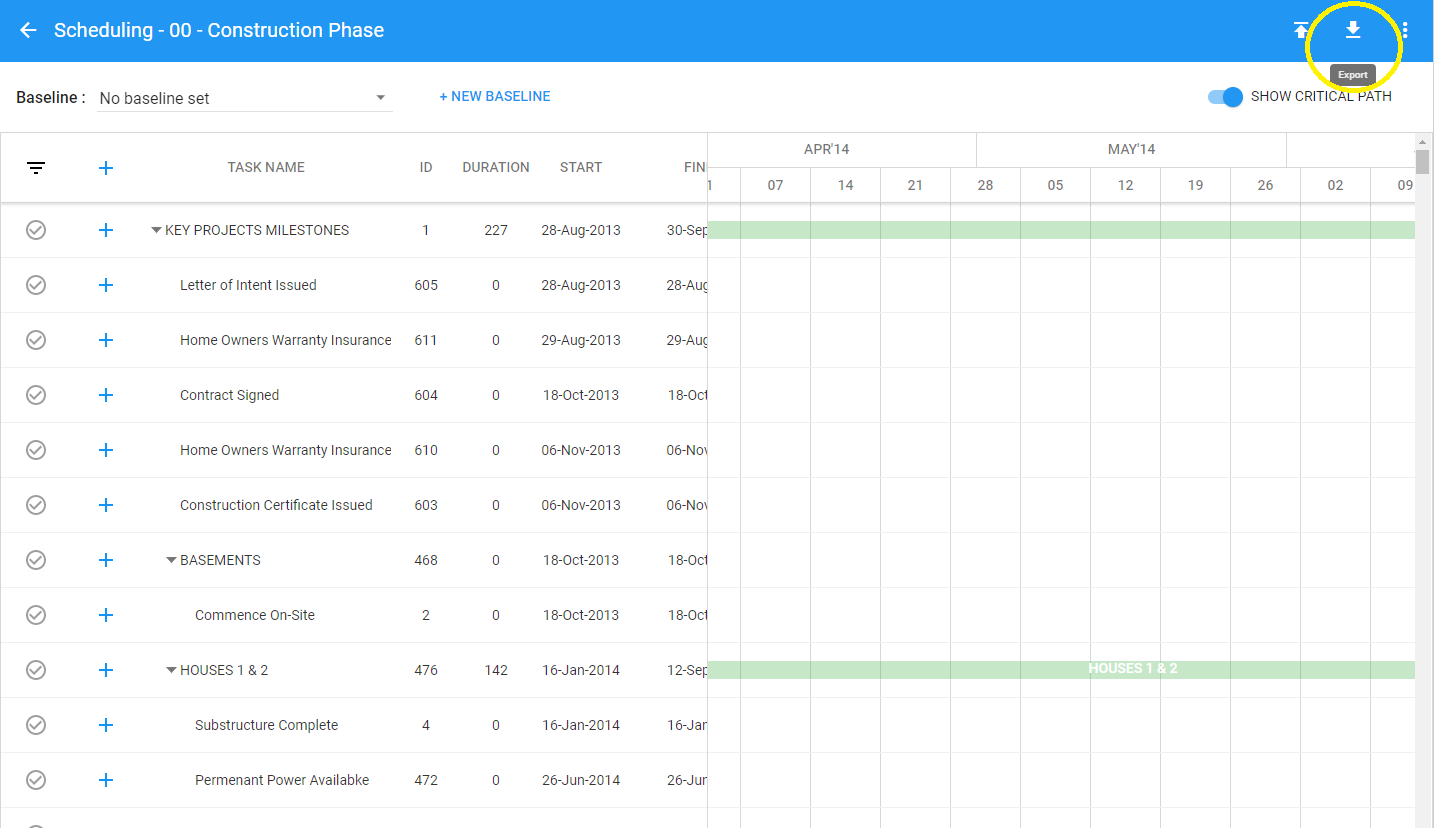
Step 2: Click the Export icon button
Click the Export from MS Project icon downward button in the top right hand corner and select “MS Project”.
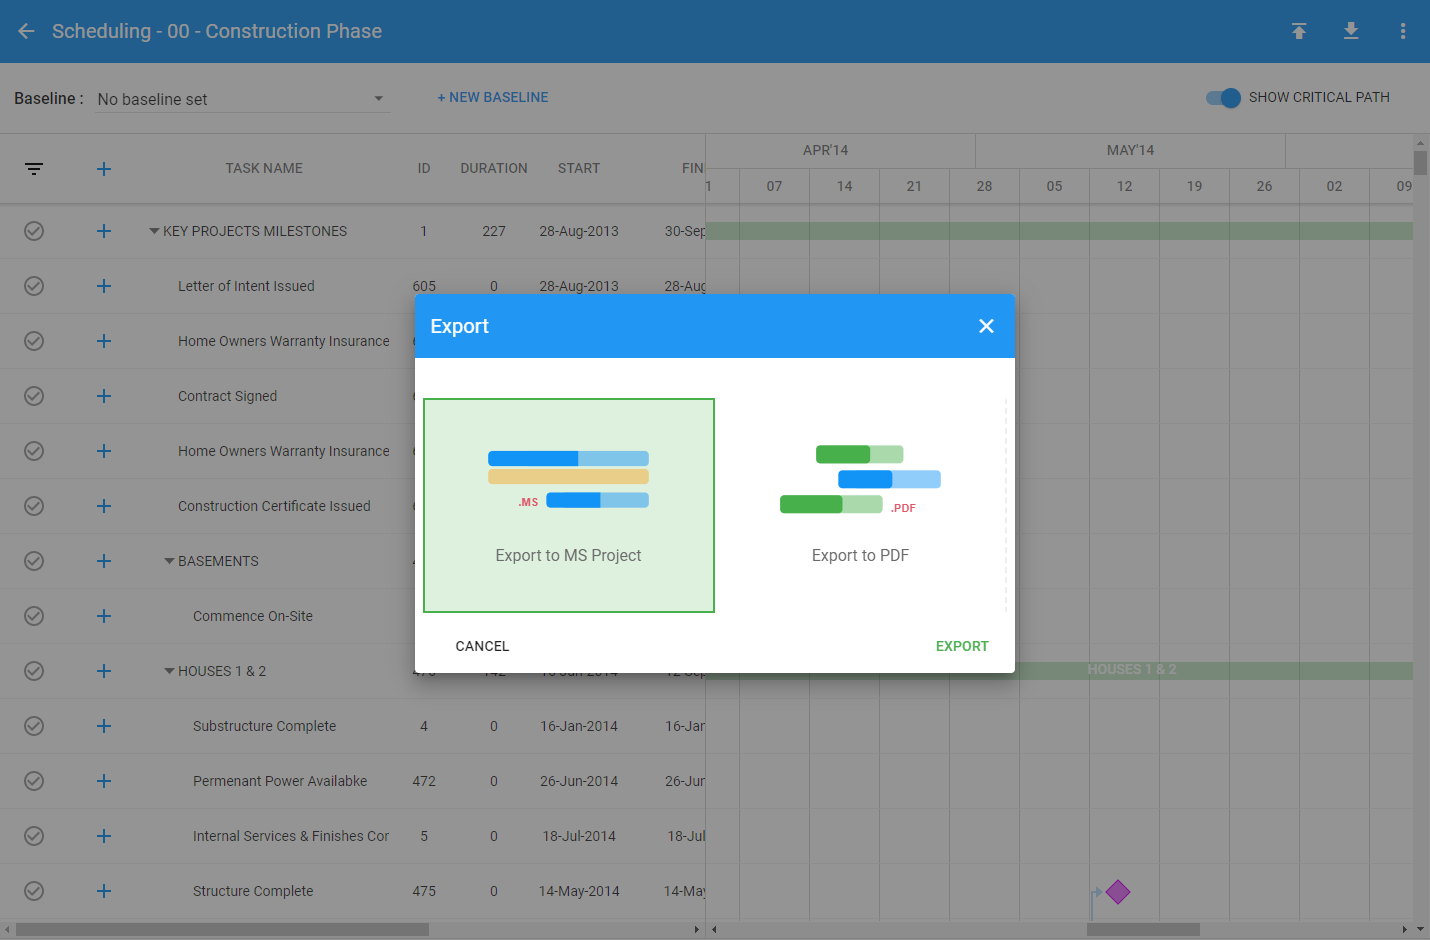
Step 3: Select Export to MS Project
Select “Export to MS Project” and click the “EXPORT” button.
Scheduling - Export your schedule to PDF (schedule report)
Scheduling – Export your schedule to PDF (schedule report)
To export your project’s schedule in PDF format, follow the steps below.
Step 1: Go to your Project’s Schedule
Navigate to your Management module in your related project and click on the Scheduling tool to access your project’s Schedule.
Step 2: Click the Export icon button
Click the Export from MS Project icon button and select “MS Project”.
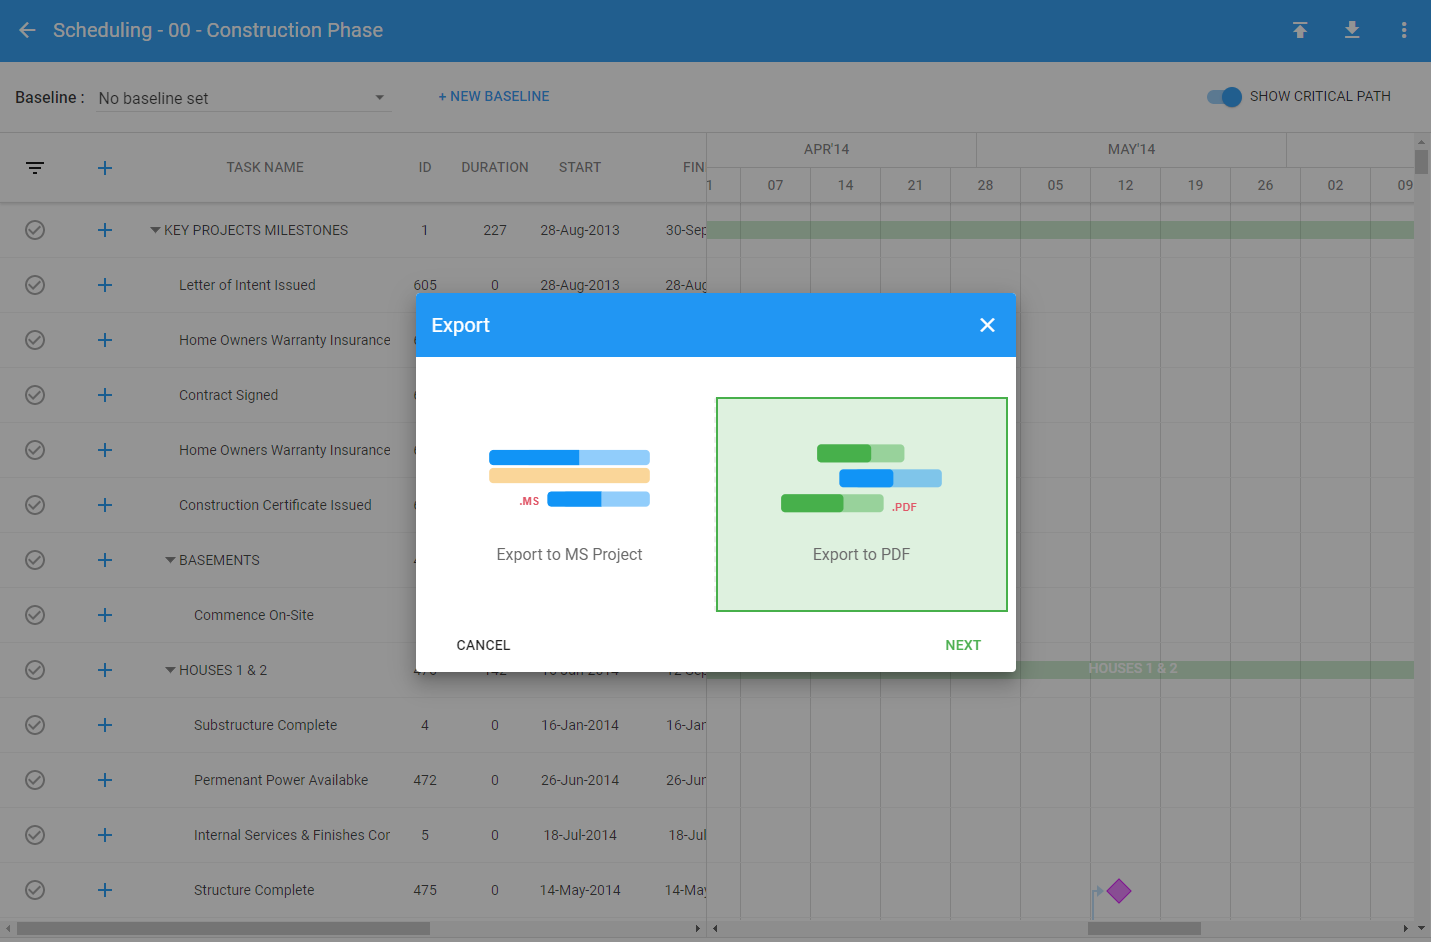
Step 3: Select Export to MS Project
Select “Export to PDF” and click the “EXPORT” button. You can then download the report by clicking the “Download” button.
Critical Path Method (CPM) is a defining resource for the construction industry. First developed in the late 1950s, the critical path method has been utilised in a variety of project development projects including engineering, aerospace and plant maintenance. CPM has rapidly become an essential staple for construction projects today, but many business owners are intimidated from what is perceived as a complex process.
https://www.webuildcs.com/wp-content/uploads/Scheduling_blog_thumbnail-copy.jpg7491123WeBuildhttps://www.webuildcs.com/wp-content/uploads/webuild-logo-R.pngWeBuild2023-04-05 11:18:322023-08-25 03:53:29Critical Path Method: Simplifying the process for your construction business
The value of As Built drawings is often underrated, especially their importance for the efficient management of the project after construction has been completed. This article takes a brief look at As Built drawings; what they are, how they are created and why they are important.
https://www.webuildcs.com/wp-content/uploads/A-guide-to-As-Built-Drawings.png315560WeBuildhttps://www.webuildcs.com/wp-content/uploads/webuild-logo-R.pngWeBuild2023-04-04 12:37:002023-07-23 10:09:39A Guide To Construction As Built Drawings
The customary monthly clients meeting is a time when you have the chance to give your clients progress updates about their project and provide them with a monthly report. Your monthly report says a lot about your professionalism and should not be rushed or overlooked. It is an ideal way to instill confidence in your clients about your company’s ability to communicate, and to demonstrate that you have a solid understanding of their project and their priorities.
https://www.webuildcs.com/wp-content/uploads/How-to-prepare-the-best-construction-client-report.png315560WeBuildhttps://www.webuildcs.com/wp-content/uploads/webuild-logo-R.pngWeBuild2023-04-03 11:35:132023-07-23 10:07:42How to prepare a great construction client report (Infographic)